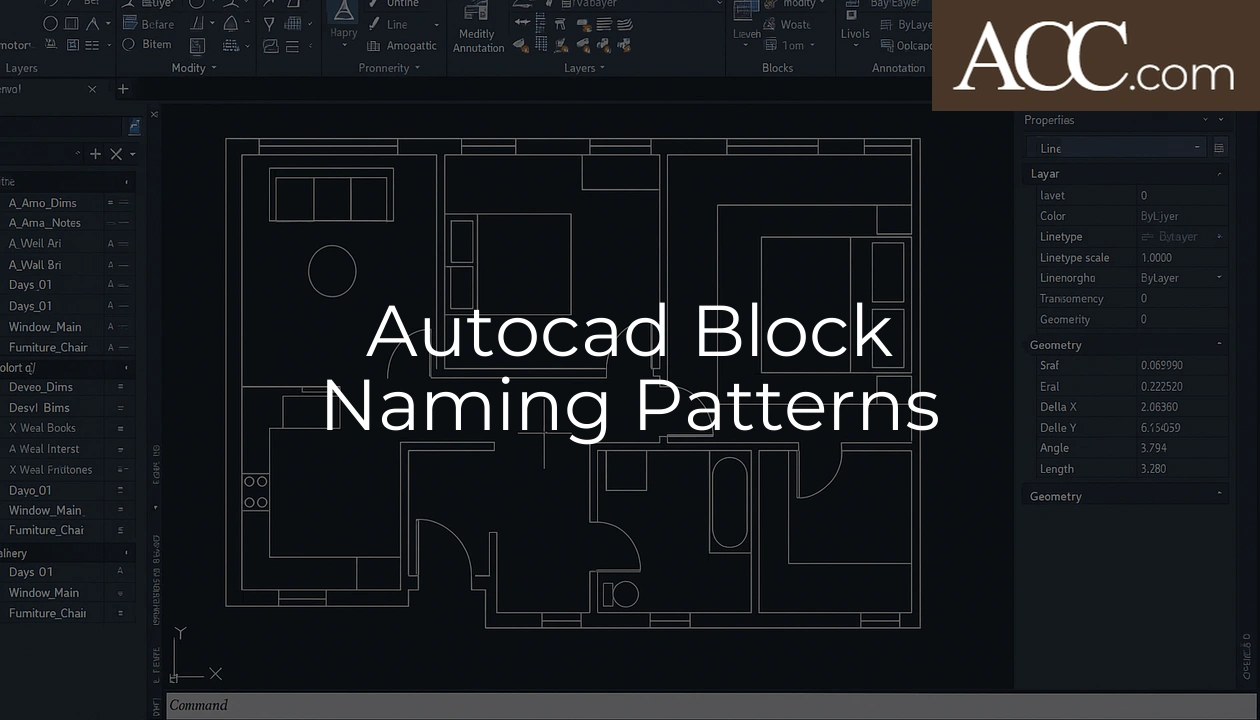
AutoCAD Block Naming Patterns
Last updated:
August 26, 2025
Autocad Block Naming Patterns?
What’s in this article?
This guide explains AutoCAD block naming patterns and how to design consistent, scalable naming conventions for projects of any size. You’ll learn why conventions matter, the core components of a block name, discipline-specific schemas, how industry standards affect naming, rules for dynamic and nested blocks, attribute patterns for BOMs, versioning strategies, automation options, and practical examples for small, medium and large projects. Each section includes actionable best practices to help CAD managers and drafting teams implement, enforce, audit and migrate naming standards across DWGs and BIM systems.
What are AutoCAD block naming patterns?
AutoCAD block naming patterns are standardized formats and syntax rules used to create clear, consistent names for blocks (reusable drawing components) in CAD libraries and project drawings. A pattern defines which elements appear in a block name — for example discipline, object type, size, material, finish, and status — and the order, separators, and abbreviations used. Well-designed patterns make blocks discoverable, reduce duplication, improve interoperability with scripts and schedules, and simplify downstream tasks like parts lists and BOM extraction. A naming pattern also encodes metadata that can be parsed by automation routines, attribute extraction, or by BIM workflows mapping blocks to families or objects in other systems.
Why is a consistent block naming convention important?
Consistent block naming prevents chaos in drawing libraries and across project files. When names follow a predictable pattern, team members can find components quickly, avoid creating duplicate blocks, and reduce errors during drawing production. For CAD managers, a convention reduces time spent cleaning, renaming, and reconciling blocks between disciplines. For integration and automation, predictable names are essential: scripts, batch tools, and attribute-extraction routines rely on consistent tokens to parse and group items for schedules, BOMs and procurement lists. Consistency also supports quality control, enabling automated audits and compliance checks across multiple DWGs.
What core components should a block name include (discipline, type, size, material, finish)?
A practical block name should include a compact set of core components that together describe the object sufficiently for identification, sorting, and automated parsing. Core components typically are discipline, type, size, material, and finish. Keep tokens short, unambiguous, and ordered to support alphabetical sorting and filtering.
Recommended ordering and rationale:
- Discipline first (e.g., ARCH, STR, MEP) to group by team or system.
- Type or family next (e.g., DOOR, WINDOW, DIFFUSER) as the primary identifier.
- Size or configuration after type (e.g., 900×2100, Ø150, 2L) for quick visual differentiation.
- Material following size (e.g., AL, STL, WD) to help procurement and specification mapping.
- Finish or special treatments last (e.g., PTD, GALV, MAT) for scope and installation notes.
Example format: ARCH-DOOR-900×2100-WD-PTD or MEP-FAN-Ø300-AL-HF (where HF = high flow). Use a single consistent separator (dash or underscore) and a controlled abbreviation list. Avoid long natural-language descriptors; prefer controlled vocabularies that map to attribute tags and schedule fields. Include a status or revision suffix only when necessary (see versioning section).
What are common block naming schemas used in architecture, MEP, structural and civil projects?
Different disciplines emphasize different tokens. Below are common schemas that balance human readability with machine parsing. These examples assume a dash (-) separator and uppercase tokens for visual consistency. Keep abbreviation lists managed in a shared document for cross-discipline clarity.
Architecture schema (example):
ARCH-FAMILY–TYPE–SIZE–MATERIAL–FINISH–STATUS
Examples: ARCH-DOOR-SLID-900×2100-WD-PTD, ARCH-FURN-BENCH-1800-LAM-NAT
MEP schema focuses on service and flow characteristics:
MEP-SERVICE–FAMILY–SIZE–MATERIAL–SPECIAL
Examples: MEP-HTR-RADI-600×300-STL, MEP-AHU-RTU-Ø800-SS-HVAC
Structural schema centers on member type and properties:
STR-MEMBER–PROFILE–SIZE–PROCESS
Examples: STR-BEAM-IPE-350-UB, STR-PLATE-SLAB-200-REINF
Civil schema often includes element class and survey reference:
CIV-ELEMENT–SIZE–MAT–ID
Examples: CIV-MANHOLE-1200-CON-REF01, CIV-PIPE-Ø300-PVC-CHAIN01
Cross-disciplinary considerations:
- Use discipline prefix tokens (ARCH, MEP, STR, CIV) to filter libraries.
- Keep family/type vocabularies consistent across projects (e.g., DOOR vs DRS).
- Map abbreviations to project specifications and procurement codes.
Adopt abbreviations that align with contract documents and asset registries to make downstream procurement and maintenance easier. Where possible, coordinate the schema with BIM naming standards or project data dictionaries.
How do industry standards (AIA, BS/ISO 1192 & ISO 19650) influence block naming?
Industry standards influence the semantics, data structure, and governance of naming conventions rather than prescribing literal block names. AIA layering and naming guidelines emphasize clarity, file structure, and the use of consistent codes; BS/ISO 1192 and ISO 19650 focus on information management, classification, and metadata requirements across the asset lifecycle. These standards push CAD managers to treat block names as metadata carriers that must interoperate with a project’s Common Data Environment (CDE) and classification systems (e.g., Uniclass, Omniclass).
Practical impacts of standards:
– Metadata alignment: Standards encourage embedding structured tokens that map to project classification codes so blocks can be linked to specifications, schedules, and asset registers.
– Governance: ISO 19650 requires documented naming and information management processes; block naming should be part of that documented workflow with assigned owners, change control and approval steps.
– Interoperability: Where models and drawings are exchanged between disciplines and systems, block naming should map cleanly to BIM families, classification codes and shared data dictionaries to reduce translation ambiguity.
Actionable steps:
Maintain a mapping table between your block naming tokens and the chosen classification system. Document naming rules in the project BIM execution plan and include them in template DWGs and CDE upload procedures. By treating block names as structured metadata aligned to standards, you improve the integrity of information during design, construction and handover.
What are best practices for prefixes and suffixes in block names (discipline, status, revision)?
Prefixes and suffixes are positional cues that help group and filter block libraries. Best practices emphasize restraint and clarity:
Prefixes (leftmost tokens):
- Use discipline prefix (ARCH, MEP, STR, CIV) to group blocks at the top level.
- Consider system/service prefixes for MEP (HVAC, PLB, ELEC) if libraries are large.
- Keep prefixes short and consistent to support alphabetical sorting and palette structures.
Suffixes (rightmost tokens):
– Use status tokens (DRAFT, FOR_REVIEW, ISSUED) and revision codes (R01, V2) at the end so automated parsing can ignore them when grouping by family. Reserve suffixes for transient states, not for permanent classification. If revisions are tracked outside the name (e.g., in a BIM CDE), prefer not to include revision in the name to avoid duplicate blocks.
General rules:
– Separate status tokens with a consistent separator and avoid embedding spaces.
– If you must include life-cycle or warranty info, keep those as attribute values rather than embedding them in the core block name.
How should you name dynamic blocks and their visibility states?
Dynamic blocks introduce configuration complexity because one block can represent multiple variants. Name the dynamic block for its family and primary function, and avoid encoding every state into the block name. Use visibility state names and attribute values to distinguish variants instead of making separate static blocks for each state.
Recommended approach:
– Block name: FAMILY-DYNAMIC or DISC-FAMILY-DYN (for example ARCH-WINDOW-DYN or MEP-DIFFUSER-DYN).
– Visibility states: use short, descriptive state names inside the block definition (e.g., LEFT, RIGHT, DOUBLE, LOUVERED). Visibility states should be human readable and consistent across families so scripts and users can rely on them.
– Attributes and lookup tables: use attributes such as TAG, SIZE, PARTNO, OPERATION (e.g., OPENING=SLIDING) to store variant-specific data that schedules and BOM routines can extract. For dynamic geometry that influences BOM quantities, set up attribute-driven lookup tables where attribute values populate PARTNO and QTY fields for extraction.
– Avoid overloading the block name: encoding every configuration into the block name defeats the purpose of dynamic blocks and proliferates names. Keep the name generic and store variant specifics inside the block through visibility states, attributes, and lookup tables. When automation needs to produce schedules, have scripts read attribute values and visibility states rather than rely on name fragments.
What naming rules apply to nested, anonymous and anonymous-unique blocks?
Nested blocks, anonymous blocks and AutoCAD’s anonymous-unique duplicates (such as those created by array/explode or during block editing) require careful handling to maintain library integrity and avoid confusing names. Rules help you decide when to name nested content and when to keep it anonymous.
Nested blocks:
– Name nested blocks when the nested element is reused independently across the project or when it represents a distinct component that requires its own schedule entry (e.g., STR-BOLT). Use a predictable nested naming scheme: parent name + child type (e.g., ARCH-FURN-CHAIR_SEAT).
– If the nested block is strictly internal geometry that never needs direct referencing (e.g., a louver pattern inside a curtain panel), it can remain anonymous to reduce palette clutter.
Anonymous and anonymous-unique blocks:
– AutoCAD creates names like *U1234 for anonymous blocks. Never rely on those names for production; they are unstable across sessions and draws.
– When you encounter anonymous-unique blocks created by editing or explode operations, standardize a cleanup workflow: either redefine the anonymous block with a controlled name or replace instances with a properly named library block. Use batch tools to detect and report anonymous names.
Practical policies:
– Policy 1: Library-only names — all production parts that might be scheduled or procured must exist as named library blocks; nested parts required for scheduling must be named blocks or converted to attributes.
– Policy 2: Cleanup as standard practice — implement a routine (manual or automated) to scan DWGs for anonymous names, report counts and either reassign or purge them before issuing drawings.
– Policy 3: Reserve anonymous blocks for temporary or purely graphical constructs; if they become permanent, redefine them with controlled names and update instances.
By naming nested, reusable parts and eliminating anonymous-unique names from production sets, you keep the library coherent and automation reliable.
Are AutoCAD block names case-sensitive and what characters should you avoid?
AutoCAD block names are not case-sensitive for basic operations — BLOCK and block are treated the same within AutoCAD commands — but downstream systems, scripts or operating systems may treat case differently. For portability, adopt a single case (commonly UPPERCASE) across the library. Avoid embedding spaces, commas, colons or special characters that have reserved meanings in scripting or file systems.
Characters to avoid:
- Spaces (use dash – or underscore _ instead)
- Path characters ( / : * ? ” < > |)
- Commas and semicolons
- Non-ASCII characters (avoid accents and symbols for cross-platform compatibility)
Using a canonical uppercase-with-dashes format prevents ambiguity and reduces parsing errors when performing batch renames, exports, or integrations with other software.
How long can block names be and how should you handle length limits?
AutoCAD historically supported fairly long block names (up to 255 characters in many versions), but long names are impractical and create issues with display, palettes and interoperability. Keep names concise — typically under 64 characters — to ensure readability and compatibility with third-party tools, file systems and BIM mapping tools.
Strategies for handling length limits:
– Prefer controlled abbreviations and a consistent token order to keep names short.
– Move verbose information into block attributes (e.g., DESCRIPTION, MANUFACTURER) rather than appending to the name.
– Use a project-wide abbreviation dictionary and enforce it through templates and validation scripts so that token lengths are predictable.
How do you design a naming convention that supports BOM/parts lists using attribute tags?
Designing a block naming convention that supports BOM and parts lists requires combining meaningful block names with structured attributes that contain the data you want to extract. Block names help human organization and filtering; attributes provide the machine-readable fields that populate schedules and procurement lists.
Core design steps:
1. Define required schedule fields
Begin by listing which fields will appear on BOMs and parts lists (for example: TAG, QTY, PARTNO, DESCRIPTION, MATERIAL, FINISH, WEIGHT, SUPPLIER). Make this list part of your CAD standards and align it with procurement and asset management needs.
2. Map fields to attributes
Create standard attribute tags inside each block definition that match your BOM columns. Example common tags: TAG, QTY, PARTNO, DESC, MAT, FIN, WT, SUPPLIER. Attribute TAG should be used for drawing callouts, PARTNO for procurement and QTY for quantity calculations. Use consistent capitalization and naming so scripts can reliably locate attributes.
3. Use lookup tables and formulas
For families with multiple variants, embed lookup tables inside the dynamic block that populate PARTNO, DESC or QTY based on the selected visibility state or parameter values. This allows a single dynamic block to output correct BOM data for each configuration.
4. Keep the block name focused
Use the block name to describe family and basic identifying tokens (discipline-family-size). Avoid putting procurement data like part numbers or supplier names in the block name; place those inside attributes so they are easy to extract and update without renaming blocks.
5. Attribute defaults and templates
Provide block templates with default attribute values and dropdowns to reduce entry errors. Use attribute prompts and default values to ensure fields are not left blank. For large libraries, maintain a master CSV of PARTNO to DESCRIPTION mappings that automation can reference when populating or validating attributes.
6. Extraction and mapping
Use AutoCAD’s DATAEXTRACTION tool or third-party utilities to extract attributes into schedules. When exporting, map attribute tags directly to schedule columns. Ensure your extraction templates are version-controlled and included in project templates.
7. Validation rules
Implement validation scripts or checks that flag missing critical attributes (like PARTNO or QTY) before issuance. Include attribute completeness checks in your CAD QA checklist to prevent incomplete BOM items.
By using clear block names for organization and robust attribute tagging for data, you create a reliable bridge between drawing content and BOMs or parts lists used for procurement, fabrication and asset management.
What attribute naming patterns work best for extracting schedules (TAG, QTY, PARTNO)?
Attribute naming patterns should be short, standardized and unambiguous. Use uppercase, underscore-free tags and reserve specific tags for mandatory schedule fields. A recommended core set:
– TAG: a human-friendly identifier used in drawing callouts and for cross-referencing.
– QTY: quantity per block instance; if dynamic geometry changes quantity, ensure the attribute or calculation reflects that.
– PARTNO: manufacturer or procurement code used to order the item.
– DESC or DESCRIPTION: a concise textual description for the schedule.
– MAT or MATERIAL: material code for procurement and specification mapping.
– FIN or FINISH: finish or surface treatment.
– WT or WEIGHT: if required for structural or logistics calculations.
Best practice patterns:
- Use TAG, QTY and PARTNO exactly as attribute names across all families to simplify extraction templates.
- Avoid using synonyms (e.g., PNO vs PARTNO) — pick a single tag and enforce it.
- If you need project-specific fields, prefix them with project code or a short project token (e.g., PRJ_COST) but avoid changing mandatory tag names.
When extracting, map these tags directly to BOM columns and test extraction templates with sample DWGs to confirm data consistency.
How should you handle versioning, revisions and life-cycle status in block names?
Versioning and revisions are best handled by separating stable identity from transient state. The block name should represent the stable identity (family, type, size). Use suffix tokens, attributes, or external systems to track revisions and life-cycle status.
Recommended tactics:
– Avoid embedding major version numbers into block names for production libraries; instead, store version or revision in an attribute (e.g., REV = R01) or within your library metadata so automation and reports can access it without proliferating block names.
– If you must include a quick visual revision indicator in the name, place it at the far right (e.g., ARCH-DOOR-900×2100-WD-PTD-R01) and use it only for temporary work-in-progress states.
– Use a controlled revision workflow: changes to block geometry that affect parts or schedules should create a new library block version that receives a new PARTNO or internal ID, while a reference to the prior version remains in records for traceability.
– Document life-cycle statuses (DRAFT, ISSUED, OBSOLETE) and enforce them via templates and approval steps. Store life-cycle and revision metadata both as attributes and in your CDE or asset database so the drawing itself contains the key metadata for downstream stakeholders.
How can you create a cross-discipline naming matrix for multidisciplinary teams?
Creating a cross-discipline naming matrix involves aligning tokens, abbreviations and classification codes across architecture, structural, MEP and civil teams. The matrix should be a simple reference that shows how each discipline uses prefixes, family names and shared tokens so everyone uses the same vocabulary.
Steps to build the matrix:
1. Inventory common objects
Collect a master list of families used across disciplines (doors, windows, fixtures, valves, ducts, beams, pipes, manholes). Identify overlaps where the same object might be used by multiple teams (e.g., architectural door vs structural door frame).
2. Define discipline prefixes and tokens
Choose discipline prefixes and service tokens (ARCH, STR, MEP, CIV) and decide whether shared families will use a common prefix or discipline-specific variants. For example, choose whether a door block used by all disciplines is ARCH-DOOR or DOOR-ARCH style.
3. Standardize family and type vocabularies
Agree on canonical family names and acceptable type abbreviations. For instance, use DOOR-SWING for swinging doors and DOOR-SLID for sliding doors across all teams. Keep the abbreviation dictionary centralized.
4. Map classification codes
Include mappings to classification systems like Uniclass or Omniclass in the matrix. Provide columns for the block token, the human-readable description, the classification code, and the PARTNO range if applicable.
5. Publish and version the matrix
Host the matrix in a shared location (CDE, cloud spreadsheet) with version control and change logs. Make it part of the project BIM Execution Plan or CAD standards and require sign-off from discipline leads before enforcement.
6. Implement training and templates
Deliver short training sessions and provide template DWGs, palette configurations and example blocks that demonstrate the naming rules. Include the mapping matrix inside the template documentation so drafters can reference it while working.
7. Automate checks
Where possible, implement validation scripts that compare block names to the matrix and report deviations. Enforce the use of the matrix by rejecting files that contain non-compliant blocks or by flagging them during QA checks.
By maintaining a living cross-discipline matrix, multidisciplinary teams can reduce ambiguity, avoid duplicate family definitions, and ensure that schedules and handover data are consistent regardless of who created the block.
What are common mistakes and pitfalls in block naming and how do you avoid them?
Many organizations suffer common pitfalls that complicate library management. Typical mistakes include:
– Inconsistent abbreviations across teams, which cause duplicate blocks and broken schedules.
– Overly long names that attempt to encode every attribute and lead to incompatibility with tools.
– Embedding transient data (status, supplier, locale) in the block name rather than in attributes or metadata.
– Leaving anonymous blocks in production which break automation and sharing.
How to avoid these pitfalls:
– Create a controlled abbreviation list and enforce it via templates and training.
– Use attributes for non-identifying metadata and keep block names focused on identity.
– Regularly audit and clean libraries to remove duplicates and rename anonymous blocks.
– Automate validation to catch non-compliant names before file issuance.
How do you implement and enforce block naming standards in templates and tool palettes?
Templates and tool palettes are frontline enforcement mechanisms. Integrate naming rules into templates and provide curated palettes to reduce ad-hoc block creation.
Implementation steps:
1. Create master template DWGs that include prebuilt, named blocks with correct attribute tags and default values. Include the abbreviation list and naming rules in a readme layer or an embedded note.
2. Build tool palettes and organize them by discipline and family. Tool palettes should include correctly named library blocks so drafters drag-and-drop compliant blocks rather than creating new ones.
3. Use design center and content management systems to publish approved libraries and restrict who can add to the master palette.
4. Automate checks: add startup scripts or batch validation tools that scan drawings on save and flag non-compliant block names, missing attributes or anonymous blocks. Provide clear reports to the user about required fixes.
5. Governance and training: appoint a CAD librarian or standards steward who reviews requests to add new families and updates palettes. Run short training sessions and include the rules in onboarding documentation.
Enforcing rules in templates and palettes minimizes accidental non-compliance and makes it easier for teams to follow agreed standards.
How can you batch-rename or clean up block names across multiple DWGs?
Batch renaming and cleanup are essential when migrating legacy libraries or preparing files for handover. There are several approaches: AutoCAD built-in tools, third-party utilities and custom scripts.
Common steps for cleanup:
– Inventory current blocks and identify duplicates and anonymous names using a scanning script or a utility that extracts block name lists from multiple DWGs.
– Create a mapping table (CSV) that defines old names and the target standardized names.
– Use a batch rename tool or script to apply the mapping across multiple DWGs. Always back up DWGs before batch operations.
– Rebind or purge unused definitions and run an audit to ensure attribute tags remain intact after renaming.
Tools and methods:
- AutoCAD’s INSERT/BLOCK commands combined with data extraction for reporting.
- Third-party utilities (e.g., BlockTools, CADPower) for bulk operations.
- Custom AutoLISP or .NET scripts for controlled renaming workflows.
Adopt a testing workflow: run the rename on a subset of drawings, validate schedules and attributes, then roll out to the full set once verified.
Which AutoLISP, .NET or script approaches automate block naming and validation?
Automation accelerates enforcement and reduces human error. Common scripting approaches include AutoLISP for lightweight tasks, AutoCAD .NET (C# / VB.NET) for robust integrations, and simple batch scripts using the command line for file-level operations. Consider using these approaches to detect non-compliant names, rename blocks according to mapping rules, populate attributes, and generate compliance reports.
AutoLISP use cases:
– Quick scanning tools that list block names in the current DWG and flag anonymous names.
– Small batch renaming when paired with file iteration methods.
AutoLISP is easy to distribute to drafting teams for local checks and fast fixes.
.NET (C# / VB.NET) use cases:
– Professional-grade validation tools with UI, logging and integration into CAD management systems.
– Complex operations such as rebuilding blocks, migrating attributes, or performing geometry-based checks before renaming.
.NET applications can be deployed as plugins or as part of CAD standards toolsets for enterprise workflows.
Scripting and file-level approaches:
– Use Windows PowerShell with AutoCAD command-line invocations or with Teigha/ODA libraries to open and modify DWGs in batch.
– Use Forge APIs or cloud-based CAD services to validate naming in a CDE during uploads.
Common automation patterns to implement:
- Scan and report: enumerate block names, attributes and instances and output CSV or JSON.
- Validate: compare existing names to the naming matrix; produce non-compliance reports.
- Rename: apply a mapping table to rename blocks and update instances while preserving attributes.
- Attribute populate: fill missing attributes from lookup tables or external CSVs.
- Purge & replace: remove anonymous or duplicate blocks and replace instances with library-approved blocks.
Best practice: build automation with dry-run and backup modes, and include thorough logging. Pilot the tools with a small set of DWGs and enable rollback to prevent irreversible changes.
How do block naming conventions map to Revit families and other BIM systems?
Mapping AutoCAD block naming to Revit families requires translating flat block names and attributes into Revit’s richer family/type/parameter model. The goal is to preserve identity and metadata so objects can be replaced or linked with minimal data loss.
Mapping approach:
– Block family -> Revit Family: the block’s family token corresponds to a Revit family name.
– Block type/size -> Revit Type: size or configuration tokens map to Revit types within the family.
– Attributes -> Revit parameters: attribute tags like PARTNO, MAT and FIN should map to shared or project parameters in Revit to preserve BOM data.
Practical tips:
– Keep attribute names consistent and map them to parameters with the same semantic meaning in Revit. Use shared parameters if you need them across projects.
– For dynamic blocks, map visibility states to Revit type parameters or nested family types where appropriate.
– Maintain a mapping spreadsheet that lists block name tokens, target Revit family/type, and parameter mappings. Use that spreadsheet in migration scripts or manual import processes.
– When exporting from Revit to DWG, configure Revit export naming rules so the generated blocks follow project naming conventions if round-tripping is required.
By planning the mapping and preserving key attributes, you can make AutoCAD content interoperable with Revit families and other BIM systems for fabrication, handover and asset management.
How should block libraries be organized on disk and in cloud repositories for naming consistency?
Organize libraries to mirror your naming schema and to make retrieval intuitive for users and tools. A clear folder structure combined with naming conventions reduces duplication and speeds access.
Folder structure recommendations:
– Top level by discipline: /ARCH, /MEP, /STR, /CIV
– Subfolders by family or system: /ARCH/DOORS, /MEP/DIFFUSERS, /STR/CONNECTIONS
– Version control and release folders: /LIBRARY/RELEASES/v01, /LIBRARY/WORKING
Cloud repository tips:
– Use a CDE or cloud file store with version control and access controls. Store the abbreviation dictionary, naming matrix and the template DWGs in the repository.
– Include index files or search metadata (JSON or CSV) that list block names, descriptions and classification codes to enable search and API access.
– Enforce check-in/check-out or approval workflows for adding new families to the official library.
Consistency is achieved when the on-disk structure mirrors the logical naming tokens (discipline, family), and when library updates follow a controlled release process.
How do you handle localization, units and language differences in block names for global projects?
Global projects require sensitivity to language, units, and local conventions. Naming strategies must balance global consistency with local clarity.
Approaches to localization:
– Use neutral, English-based tokens for block names to maximize tool and script compatibility, then provide localized descriptions in attributes (e.g., DESC_EN, DESC_FR).
– Keep units out of the block name. Store unit-specific data in attributes (UNIT = mm or UNIT = in) and ensure that dynamic geometry uses unit-aware parameters. This prevents confusion when DWGs are opened in different unit settings.
– Maintain a translation table: map canonical tokens to localized display names in a project glossary or CDE so local teams can search using native language terms while underlying names remain consistent.
– Where local regulatory codes or product numbers are required, store them as attributes (LOCAL_CODE or PARTNO_LOCAL) rather than modifying the core name. This preserves global identity while capturing local requirements.
– Establish a localization policy in the BIM execution plan that designates which fields are localized and which remain canonical. Provide scripts or UI tools that show localized labels in palettes while using the canonical name internally.
By separating canonical identifiers (used for automation) from localized display strings (used by users), you can support global collaboration without sacrificing data integrity.
How do you audit block names and create a compliance checklist for CAD managers?
A regular audit ensures naming rules are followed and that libraries remain healthy. Create a checklist and combine automated scanning with manual review steps.
Suggested audit checklist items:
– Verify discipline prefixes and family tokens follow the naming matrix.
– Check for anonymous or anonymous-unique block names and resolve them.
– Confirm mandatory attributes (TAG, QTY, PARTNO) exist and contain valid values.
– Detect duplicate or near-duplicate block definitions that may indicate inconsistent abbreviations.
– Ensure no forbidden characters or lowercase/case variability exist in names.
– Validate that dynamic blocks use visibility states and attributes correctly rather than proliferating static variants.
Audit workflow:
– Run automated scans across the project DWGs producing CSV reports of block names and attribute completeness.
– Review exceptions manually and assign remediation tasks to authors or the CAD librarian.
– Maintain an audit log and include audit results in project QA reports. Aim to perform audits at milestones and prior to drawing issuance.
Can you provide sample block naming templates for small, medium and large projects?
Below are practical naming templates and examples tailored to project scale. Each template balances simplicity with future scalability.
Small project template (simple, low overhead):
Format: DISC-FAMILY-TYPE-SIZE
Examples: ARCH-DOOR-SW-900×2100, MEP-PLUG-2P-16A
This keeps names short and readable. Attributes are used sparingly: TAG and QTY are mandatory.
Medium project template (moderate complexity):
Format: DISC-FAMILY-TYPE-SIZE-MAT-FIN-STAT
Examples: ARCH-WINDOW-SLD-1200×1500-AL-ANOD-ISSUED, MEP-FAN-Ø300-SS-HF-DRAFT
Attributes: TAG, QTY, PARTNO, DESC, MAT. Dynamic blocks use visibility states and lookup tables for PARTNO.
Large project template (enterprise ready):
Format: DISC-FAMILY-TYPE-SIZE-MAT-FIN-CLS-PARTID-REV
Examples: ARCH-DOOR-HINGE-0900×2100-WD-PTD-UNCL-DR-10234-R02, STR-BEAM-IPE-350-STEEL-PRIM-CL-00123-V1
Notes for large projects:
| Token | Meaning | Example |
|---|---|---|
| DISC | Discipline prefix | ARCH / MEP / STR |
| FAMILY | Family or object type | DOOR / FAN / BEAM |
| SIZE | Key dimension | 900×2100 / Ø300 |
| PARTID | Unique library part identifier | DR-10234 |
For large projects use attributes extensively (TAG, QTY, PARTNO, DESC, MAT, FIN, REV). Maintain a centralized mapping table and use automation to enforce and populate attributes. Keep the block name stable and let PARTID and revision attributes capture lifecycle and procurement info.
What are quick-start rules for creating a simple, scalable block naming convention?
Start with three quick rules to get immediate benefits and scale later:
1. Use a discipline prefix then family then size (e.g., MEP-DIFF-Ø150).
2. Keep names uppercase with dashes and no spaces.
3. Put metadata (part number, revision, supplier) in attributes, not the name.
These rules are easy to adopt and create a foundation you can extend into a full naming matrix as project needs grow.
